AWS Trevor
Trevaaaaaaaaah!
start by cutting out all pieces carefully

AWS Trevor
you can start by folding any tabs or fold lines, or you can go through one by one with the directions.
here, we'll start off with his leg(s)

Trevor leg
fold along all vertical and horizontal fold lines. all are mountain folds ^ accept the valley fold v for the tongue of the shoe/ankle

Travor Legs
fold in tube like shape, start by gluing the bottom shoe tab and securing with tweezers if possible, then glue the leg tab, pressing together with the tweezers to secure, then fold in the sides, bottom then tops of both the bottom and top of the leg and glue to secure. now you're done your leg for now. don't glue the ankle tab as this can be used to balance at the very end

Trevor Leg
This is what you should have at this point

Trevor leg
now do the same shit to the other leg

Trevor Legs
now you have both the legs done!

Trevor legs
now set the legs aside for now and lets get the arms done

Trevor arms
lets start with his left arm as it's a bit more straight forward, fold all the tabs inwards and fold along the horizontal fold lines

Trevor Arms
Next, find the piece in the above pic and tucks the tabs in and glue them in place

Travor legs
this is what you should have so far from the back side

Trevor Arms
put the final left arm piece on the other, gluing the tabs as well as the underside of the piece where the tabs touch it for a more secure hold. then fold top flap over and glue end tab and tuck into arm

Trevor Arm
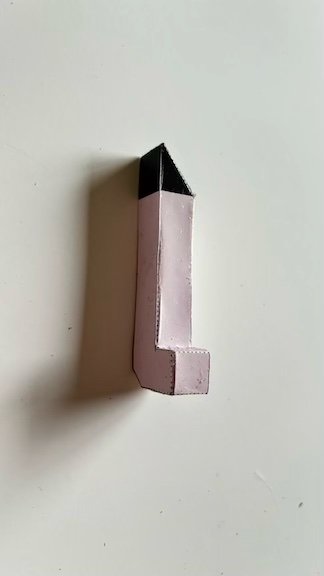
This is what you should have so far
Trevor arms
Trevor's left arm complete and looking buff

Trevor arms
onto the right arm, fold along fold lines to create the above shape

Trevor Arms
the final version has a tab at the elbow joint so it's not separate like in the pic. fold in and glue tabs into shape

Trevor Arms
This is what we should have so far. make sure to secure any tabs by pressing with tweezers if possible for best hold

Trevor Arms
once you get to this point, glue the tabs that are left

Trevor Arms
run glue on reverse side of final piece of arm where it touches the tabs on the other piece. press tabs with tweezers, fold top part over at fold line and glue and tuck in end tab

Trevor Arms
now you should be done Trevor's right arm too. set this aside for now

Trevor Head
onto Trevor's head, don't forget to use an exacto k ice to cut out the ears and fold forward, then fold in all the tabs, using the straight edge of a ruler if needed for a sharp fold

Trevor Head
Fold sides down and glue tabs in place

Trevor Head
finish folding head into box shape with tabs down

Trevor Head
fold chin lines and tuck in side tabs

Trevor Head
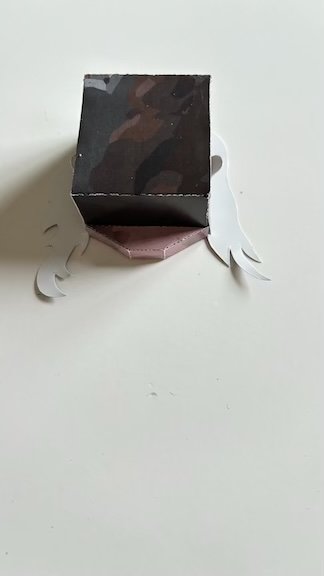
this is what it should look like from the back
Trevor Head
Attach back of head to front of head by gluing tabs and running glue around the back of the face piece where the tabs from the back piece touch it. tuck side chin pieces into sides of back piece

Trevor Head
This is what you should have for the head from the back

Trevor's head
hey look, its trevah!
set his head aside and onto the body

Trevor Body
So I don't have as many pics of putting together the body as id thought, but I do in the other members tutorial's so just check any of them except Nuno's as they're all the same, if you get stuck. But basically, you fold in the tabs and glue the side piece in place, don't forget to slightly fold down the belt line on the fold line so it matches the curve of the sides, then glue tabs and attach back panel, securing all tabs with tweezers before holding bottom panel down and gluing

Trevor Body
after gluing the bottom, fold in neck tabs and then top piece over and glue to secure

Trevor Body
Now you should have the finish realistically sculpted sexy bod of Trevor

Trevor Body
Last pic of his sexy bod, note the detail in him repping his Aaliyah shirt.

Trevor Sleeves
next is the sleeves, again, I got better pics in some of the other tutorials, but you glue the tabs together and hold them in place with tweezers til set, once dry and ready, you can glue them on the sides of Trevor's shoulders

Trevor Guitar
if you're doing these in order then this is your first guitar, gluing the side tabs down neatly around the shape of the guitar is a bit of a bitch, so just have patience and go slowly.....and get used to it because you've got a couple more coming up if this is your first.
I run some glue around the back edge of the guitar face as well as on the tabs on the side piece, sometimes tweezers help to push the pieces together as you go around, but you'll ALWAYS have to go back over it and fix it over and over again until it's in place and dry.

Trevor Guitar
This is what you should have when you're done securing the side panel, next is to attach the back panel

Trevor Guitar
glue all the side panel tabs, as well as, running a bit of glue around the back side of the back of the guitar before placing

Trevor Guitar
place the back panel on and make sure the edges lines up and gently press together

Trevor Guitar
use tweezers to adjust any parts that are sticking in or aren't in place

Trevor Guitar
the base of the guitar is done, now onto the neck

Trevor Guitar
fold the top of the neck along all the fold lines, use the straight edge of a ruler to get better folds

Trevor Guitar
Gule sides along tabs to the backside of the front of the neck like in the picture

Trevor Guitar
another picture of how the sides are glued along the front of the neck piece
Trevor Guitar
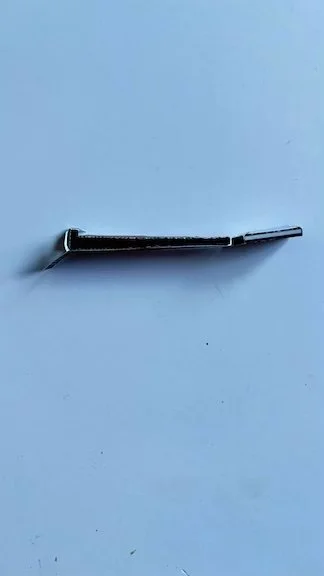
Side view of the neck of the guitar with the side pieces attached

Trevor Guitar
Glue along tabs on back of the neck as well as the underside of the back of the neck piece, line up and secure with tweezers.

Trevor Guitar
another pic of the back panel of the neck attached

Trevor Guitar
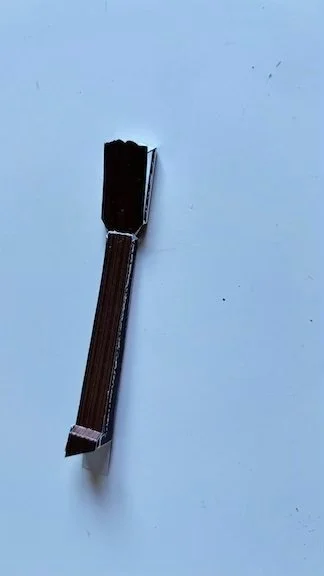
neck of the guitar.....if you're having any issues feel free to shoot me a message
Trevor Guitar
Make sure the top tabs on the back of the neck are glued and secured too

Trevor Guitar
Fold the tuning knobs in half and then again in the opposite direction (up) along the edge of the bottom bars, glue the bottom bars to the sides of the head of the guitar like in pic

Trevor Guitar
glue the tuning knobs on the other side of the head of the guitar

Trevor Guitar
line up strings and glue underside in place as well as the tabs at the bottom of the guitar neck to the body of the guitar

Trevor Guitar
this is what you should have so far

Trevor Guitar
marvel at your little wonder with accurate wear marks and all

Trevor Guitar
attach the bottom of the guitar to one end of the guitar strap and the other to the top edge like in the pic

AWS Trevor
Trevor is the only one with left and right feet, if you look at the bottom of the soles of his shoes, one curves to the right and one to the left, make sure you note this when you attach the legs the the body's bottom panel about an inch apart. if you want to take the guitar on and off then don't glue the arms in place, just kinda wedge them in the sleeves and remove them to put the guitar on

AWS Trevor
can you believe it? you now have your very own lil Trevor to grant you magical wishes

AWS Trevor
Here's the final Trevor all ready to wipe his ass with show biz

AWS Trevor
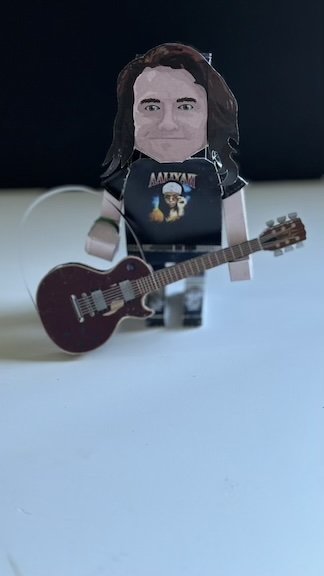
looks like it's the end of the set and time to pack up his guitar, great set Trevor, as always.
AWS Trevor
tell your lil Trevor good night and set aside as you move on to the next little buddy adventure. don't worry, you'll see him again, he'll never leave you.


