AWS Brian
Carefully cut out all Brian's pieces and get ready to party!

AWS Brian
Admire the work you've done so far

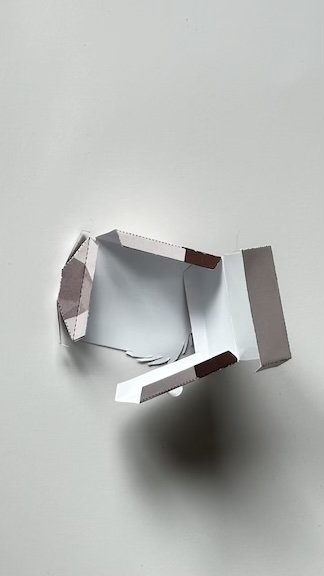
Brian Arms
so, you can start with the legs or the arms, apparently I started this one with the arms

Brian Arms
fold carefully on the fold lines, use the straight edge of a ruler to help. fold all the tabs in and get ready to put the pieces together.

Brian Arms
This is how the right(?) arm will go together

Brian Arms
Fold in tabs and glue so you have this

Brian Arms
yours should look like this, but I added a extra tab to secure that gap in the pic

Brian Arms
another angle of how his right arm goes together

Brian Arms
put glue on the tabs to get ready to put the next piece on

Brian Arms
Put glue on all tabs on both pieces and tuck the new piece's tabs into the perviously made part.

Brian Arms
start gluing and tucking and slaying!

Brian Arms
Fold the top over and tuck the tab into the arm below *put glue on the tab first.

Brian Arms
This is what you should have once done, high fn five!

Brian Arms
POOF the other one appears.....apparently I didn't take pics, but it's the same as Trevor's, check his instructions if you run into issues, or just message me.

Brian Head
Welcome to Brian's head! go around folding all the tabs in, use the straight edge of a ruler to get good lines, note theist fold under the chin is a valley fold v

Brian Head
Make sure his little ears are cut out with an exact knife before we get to gluing

Brian Head
Fold head around like a box and glue the tabs to the back of his face

Brain Head
tuck the side tab in and fold down and glue the back of the head's panel

Brian Head
fold in chin and tuck in tabs

Brian Head
Now you have a Brian head!

Brian Body
On to the body! it's pretty simple. fold in all tabs and down each side at the fold lines and the belt line at the front and the same at the back but it's a valley fold v. Glue both sides to the front panel

Brian Body
this is how the side panel should be glued

Brian Body
glue tabs at back to get ready to place the back piece on

Brian Body
Glue back piece on and fold bottom under and glue

Brian Body
Fold, tuck and glue neck tabs and fold top over and glue

Brian Body
Side view of Brian's body

Brian Body
Brian's body's done! marvel at it's wonder!

Brian Body
There's better pics of how to make these little sleeves in the other guy's tutorials if you get stuck, it's just a matter of folding the tabs in, gluing them and then pressing them together with tweezers.

Brian Body
This is what we should have so far. now you can glue the head to the neck and the sleeves to the body, but I don't suggest gluing the arms in, at least not yet, that way you can take them out so he can put his bass on.

Brian Leg
The legs are both the same, fold along fold lines with the straight edge of a ruler.

Brian legs
Glue side tabs in place and press with tweezers if possible, don't glue the middle/shoe tongue tab, this can be used to help balance him later. fold in top and bottom tabs and glue in place.

Brian hat
By now you should be getting the hang of how things go together. I don't have the greatest pics on how to put the hat together, just finished. if you have any questions or get stuck just message me.

Brian Hat
Side view of finished Brian's toque

Brian Hat
another view of Brian's toque

Brian Hat
final shot of Brian's toque

Brian AWS
Brian's toque just sits on the top of his head because of his hair. but glue his legs in place as well as his shoulders if you haven't yet. just place his arms in his sleeves for now until you're done playing with him (taking his bass on or off)

Brian Bass
You made it through making Brian, now onto his bass. it's a little trickier, but you'll be able to get through it with a little patience and tweezers. So start with the front of the bass and the long side strip

Brian Bass
Fold in all the tabs on the side of the bass strip and start with the centre white tab and line the arrows direction on the body and start carefully gluing the tabs down around the bass body , this is one of the trickiest parts to get them to stay in place as you go around, but just go slowly and have patience

Brian Bass
to make sure you've got it going in the right direction, make sure the stripes on the bass line up with the side strip as you go around

Brian Bass
after you've got the side strip secured, it should look like this. carefully add glue to the back tabs generously and get ready to glue the back panel on

Brian Bass
it might help to add glue around the blank edge of the back of the bass where it'll touch the tabs below, gently secure the back of the bass to the rest of what you've made

Brian Bass
Now you should be finished the bass body and it should look like this

Brian Bass
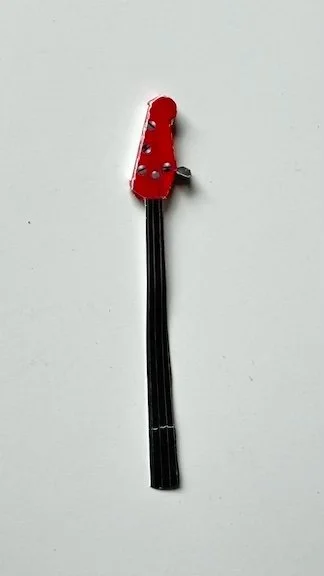
Now onto the neck of the bass, start with the front piece and fold in the tabs at the head of the bass

Brain Bass
take the one separate tuning knob and fold it in half with the tabs will straight and secure it in the gap on the rounded side of the bass head as in the pic

Brian bass
once you've secured the tuning knob, it should look like this

Brian Bass
fold and secure the side pieces of the bass neck as in the picture

Brian Bass
after securing sides, glue and secure the back piece of the neck on, note the step fold at the bottom base of it. fold the remaining tuning knobs in half and then fold the base strip of the knobs outwards and secure it to the top side of the bass head opposite of the first tuning knob you put on

Brian Bass
this is what the neck should look like from the side

Brian's Bass
line up the strings on the bass to the neck and secure with glue to the body like in the picture

Brian Bass
after securing the neck, you're almost done!

Brian Bass
Take a moment to admire the fabulous piece of musical gear you've just completed

Brian Bass
Final step is to attach the strap to the middle of the bottom of the side of the bass as well as at the top side like in the picture

Brian Bass
Ta Da! you've now completed both Brian and his signature bass! now let's reunite them!

Brian Bass
how sick do Brian and his bass look! you should feel accomplished!

AWS Brian
If you want Brian to strap on his bass, just remove his right arm from his sleeve, strap on his bass and then put his arm back in snuggly

AWS Brian
Now Brian's Complete and happy and ready to shred!

AWS Brian
Look how happy he is now that he has his bass!

AWS Brian
Look at Brian and his toque getting ready to play a Canadian show!

AWS Brian
Shredding and slaying!

AWS Brian
Now you can request your fav song any time you want! just bust out little bri, make your request and listen to it rip! (after you press play on your record player or Spotify)

AWS Brian
You should be proud of your creation, treasure him with all your heart.

AWS Brian
he's Killing it, killing it!

AWS Brian
One last shot of pure genius and talent....

AWS Brian
That's it folks! onto the next creation!


